Event Schedule
With the Event Schedule element, you can display events that you have created on an event page on another content page of your website. The element allows you to display multiple events together as a list view on one page. The individual events are displayed one below the other. If you want a display with more information, e.g., teaser text, use the Event teaser list element.
Sample View Step by step guide Screen adaption
Sample view
2028
Step by step guide
Before you can use the Event schedule element for the Frontend of your website, the events must first be added using the event pages. We will explain how to create events in toujou in this tutorial.
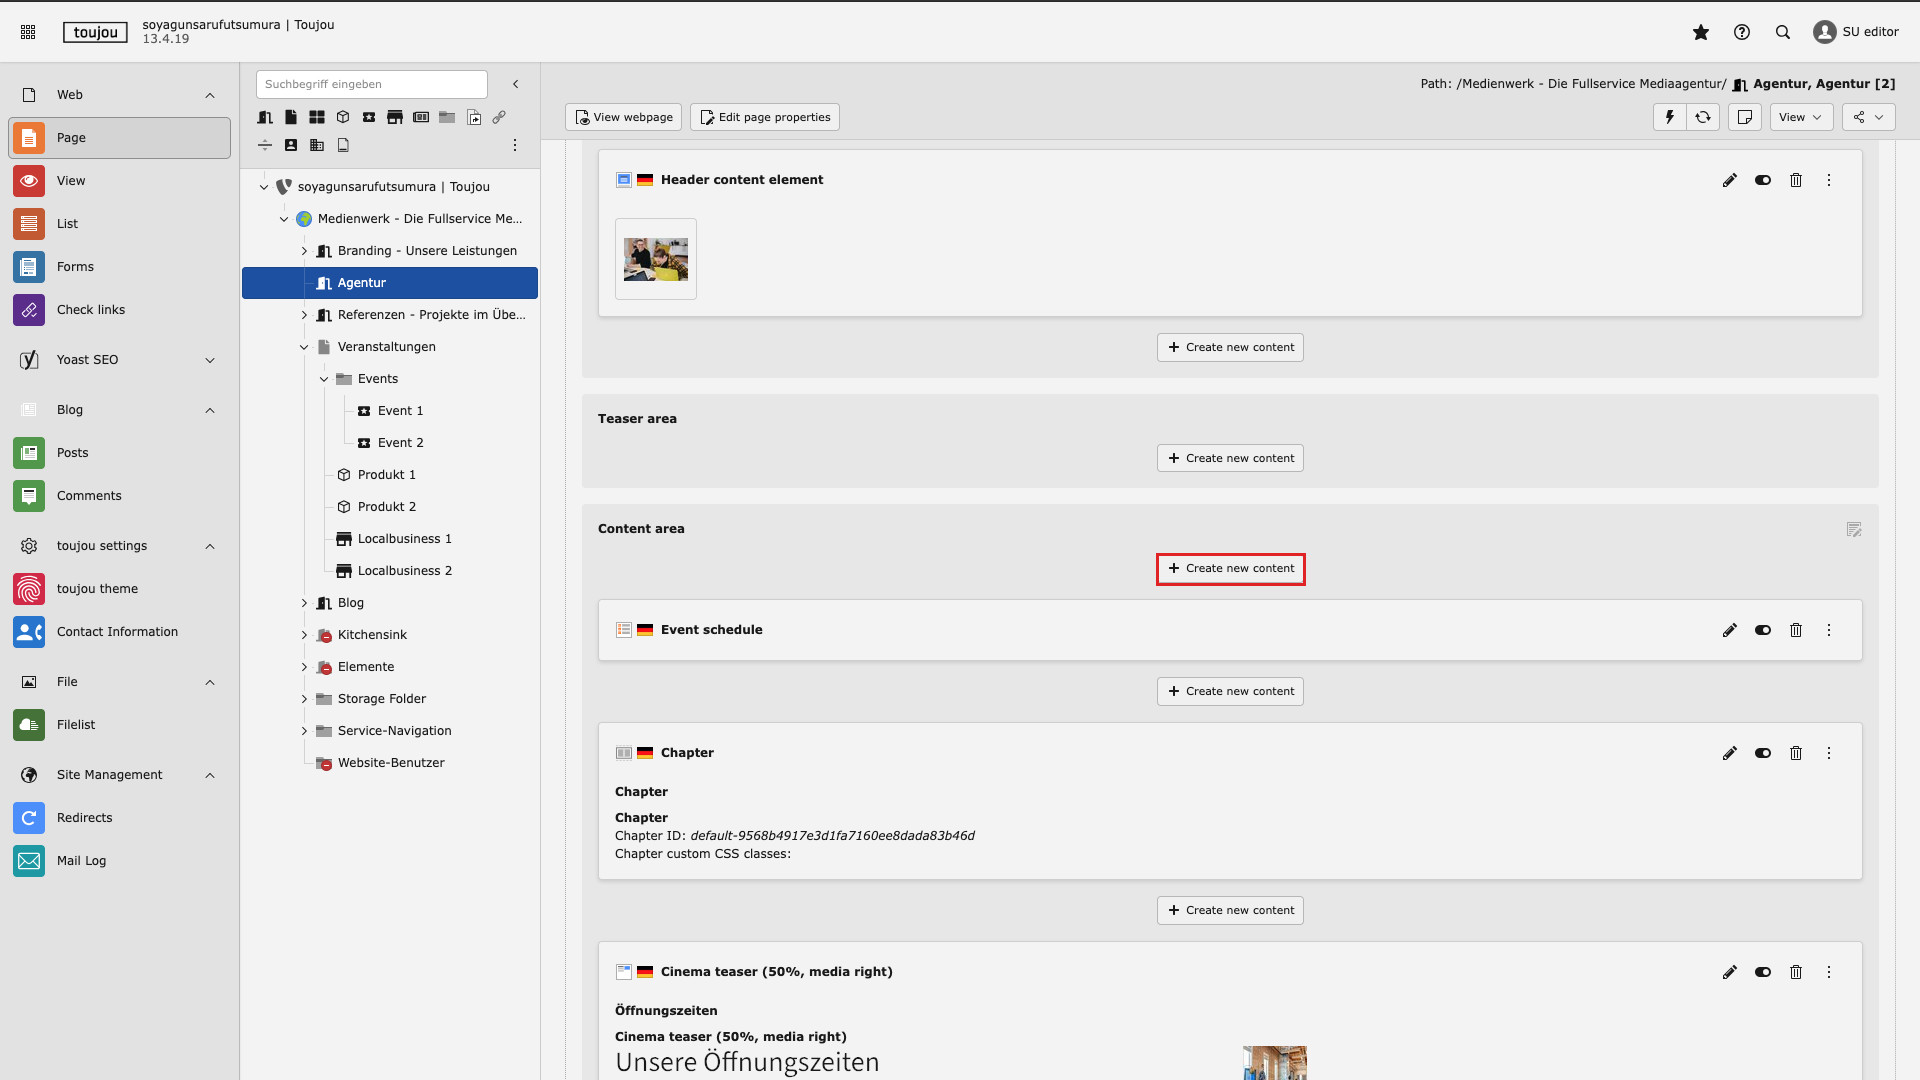
Create element
- Click the button + Create new content to create the Event Schedule element.
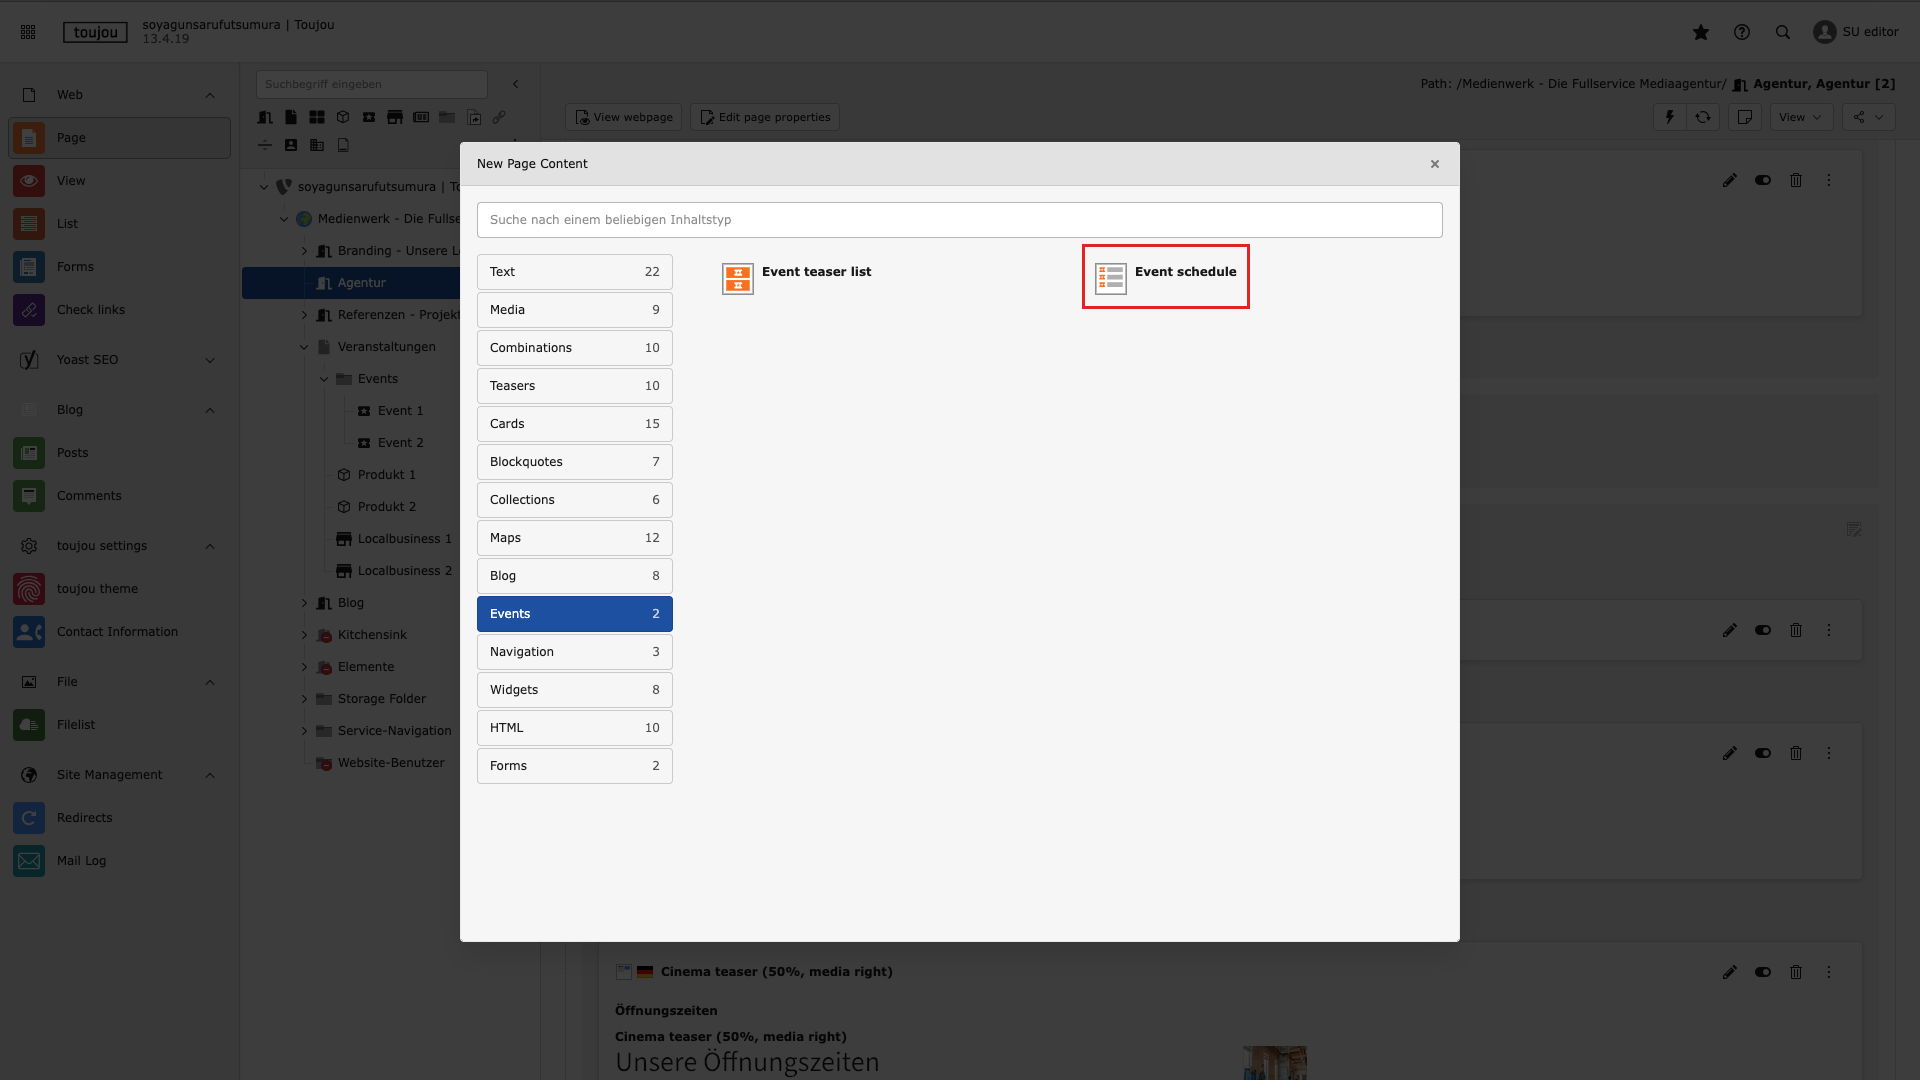
Select element
- Select the Event Schedule element in the Events tab.
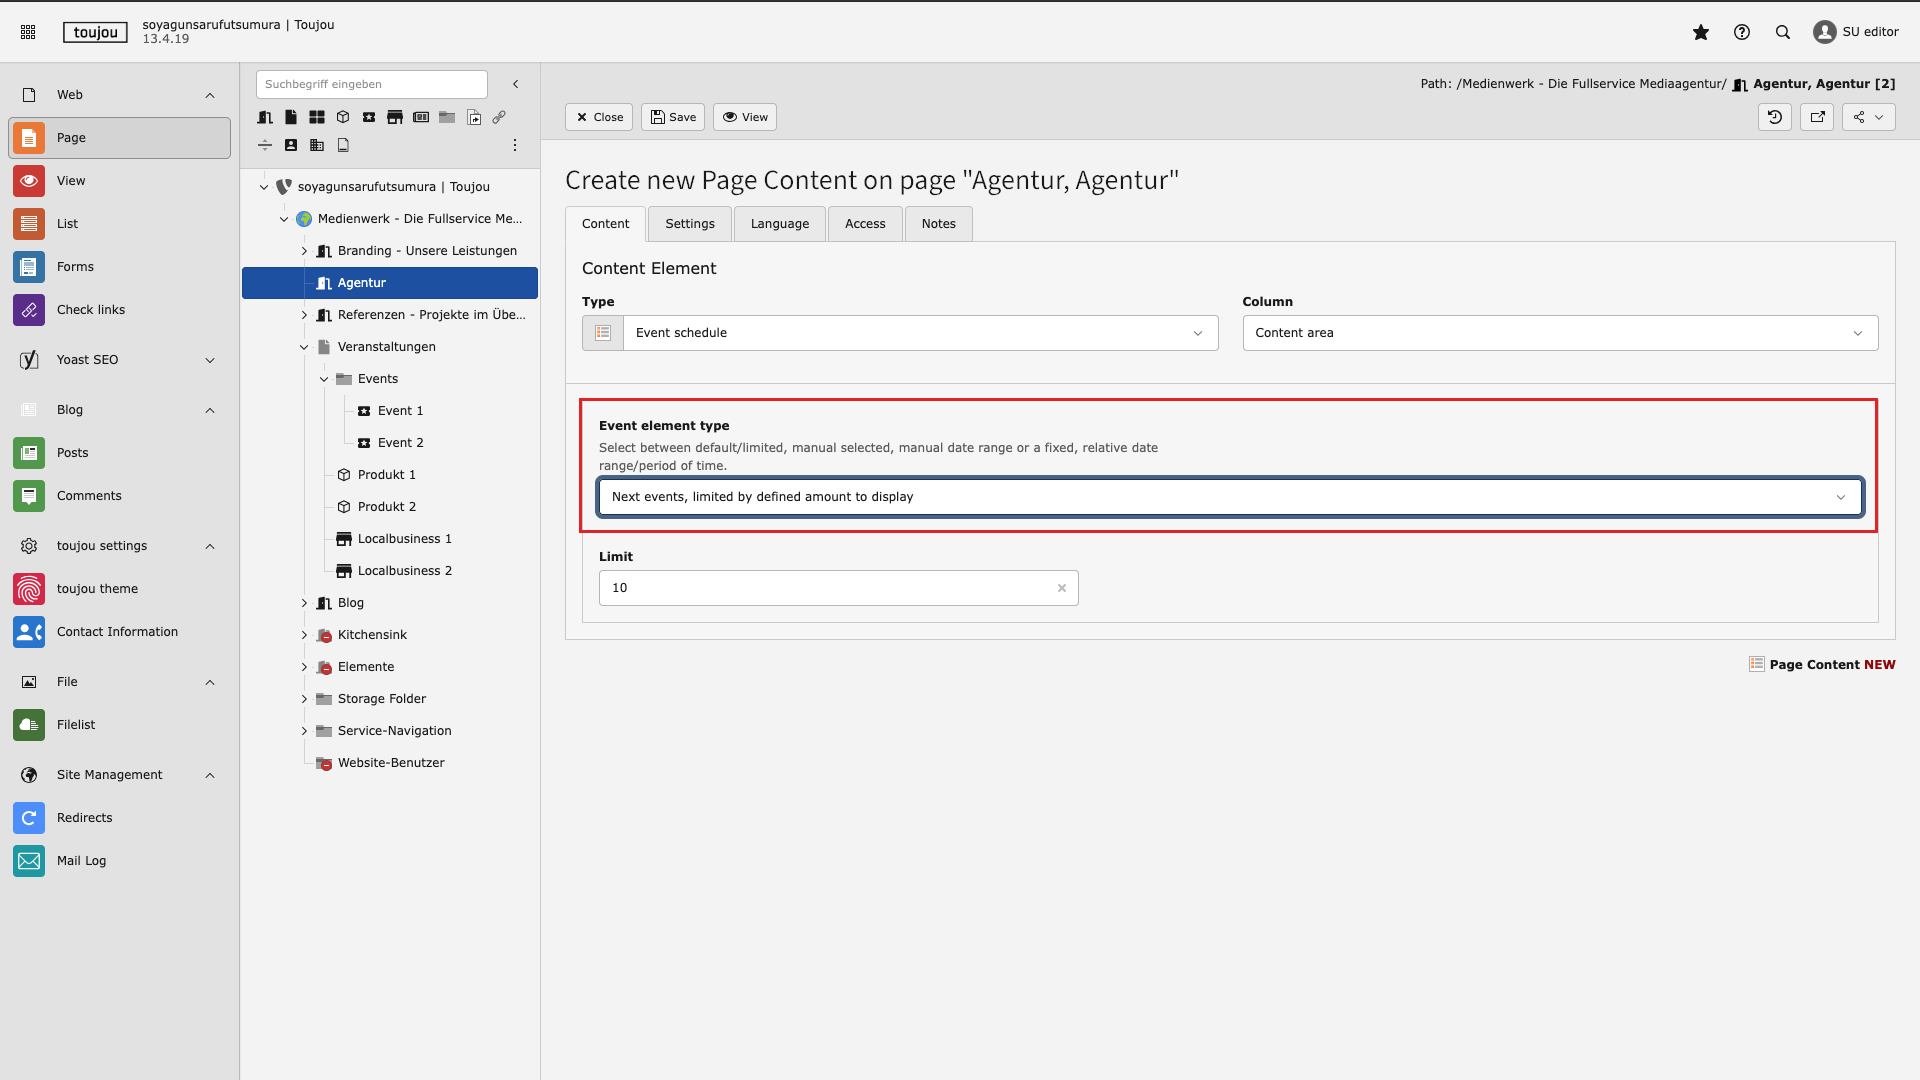
Choose settings
- Select the settings of your element in the Event element type to determine the way you would like the events to be displayed. The listing of all of the following events will be pre configurated.
Display options available for events
- Next events: With the option, next events are always displayed by their date and you can decide the number of events you’d like to display at once.
- Selected events: This display option allows you to select individual events manually.
- Manual defined date range: Only those events within your chosen date range will be displayed.
- Fixed period: This option allows you to pick a specific frequency of events within a longer pre-selected date range. Your options of frequency are: today, tomorrow, this week, next week, this month, next month.
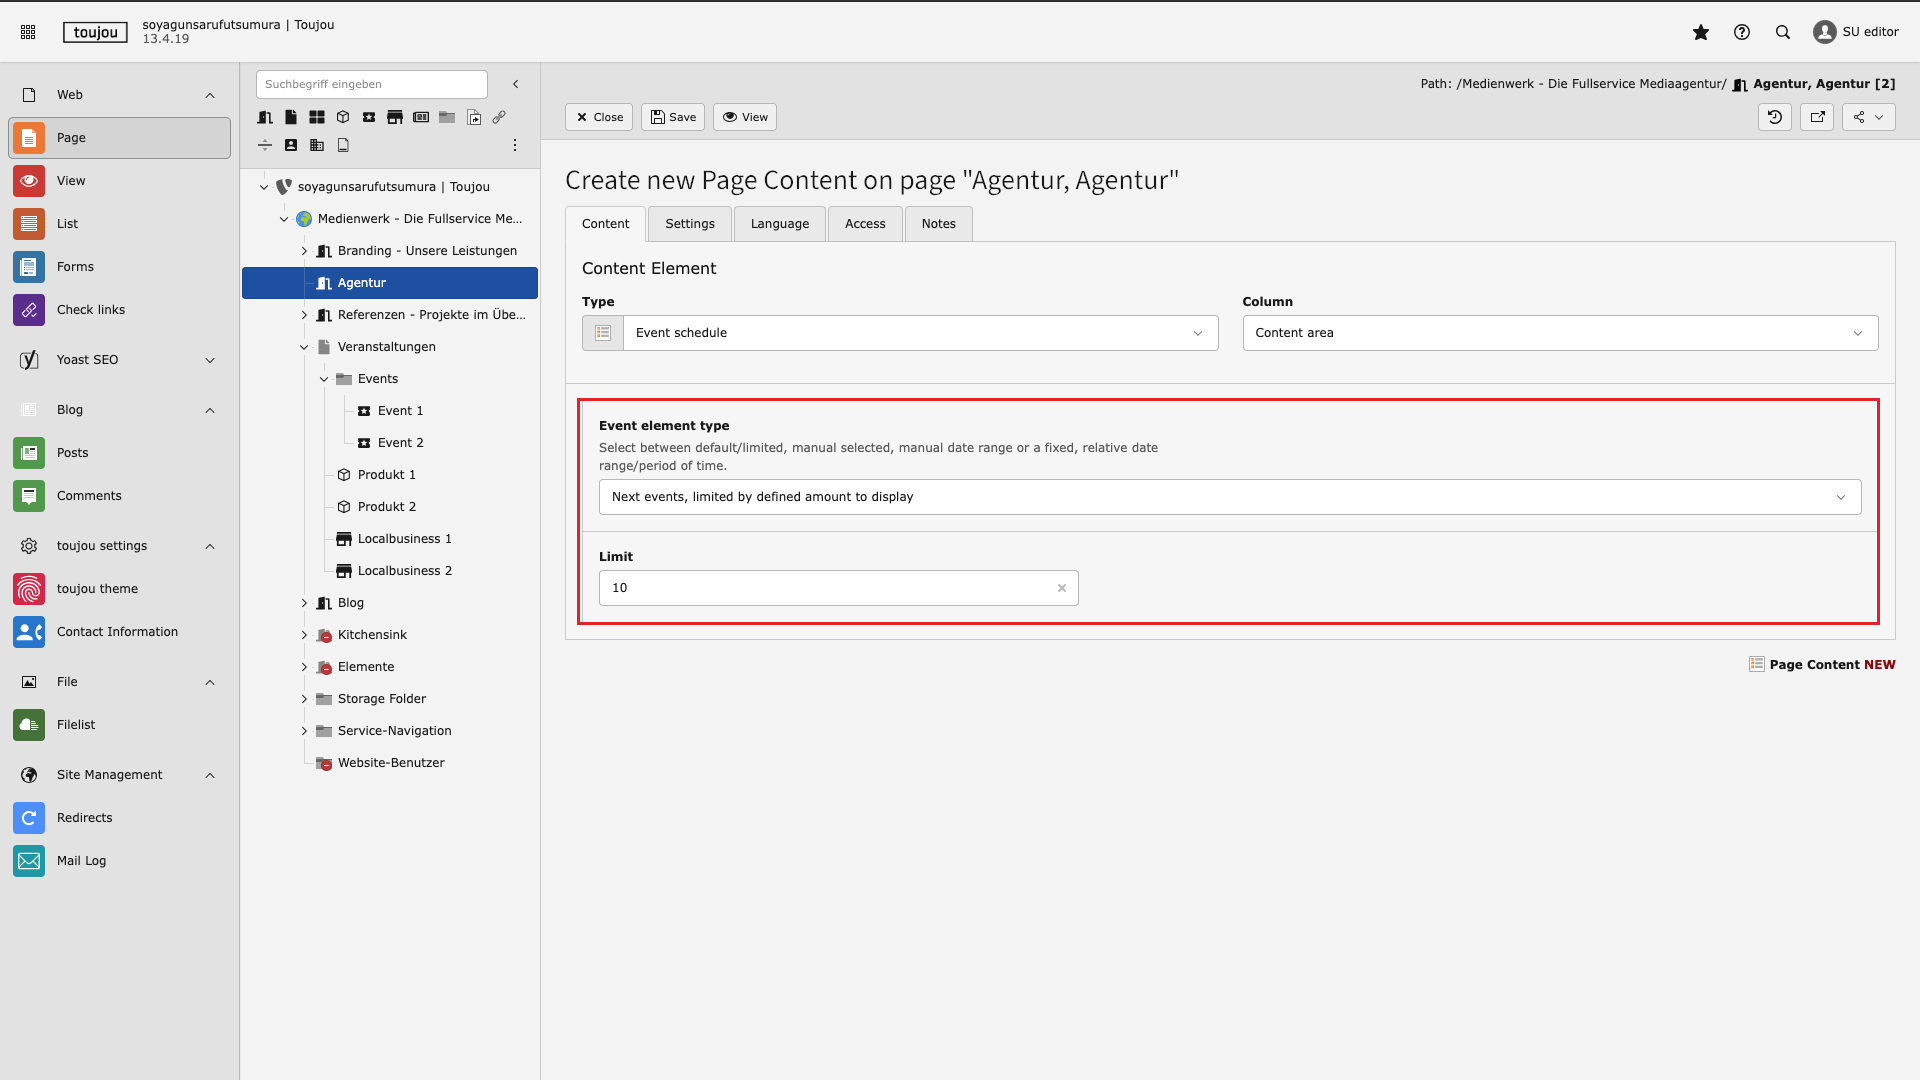
Next events
- Specify the number of events that should be displayed at once by typing the amount in the textfield limit.
- Specify more details by filling the Organizer and Location fields via available items on the right.
- Save your settings.

Selected events
- For a manual selection of individual events, type the event name in the events selection search field and then click on the respective event.
- Save the settings.
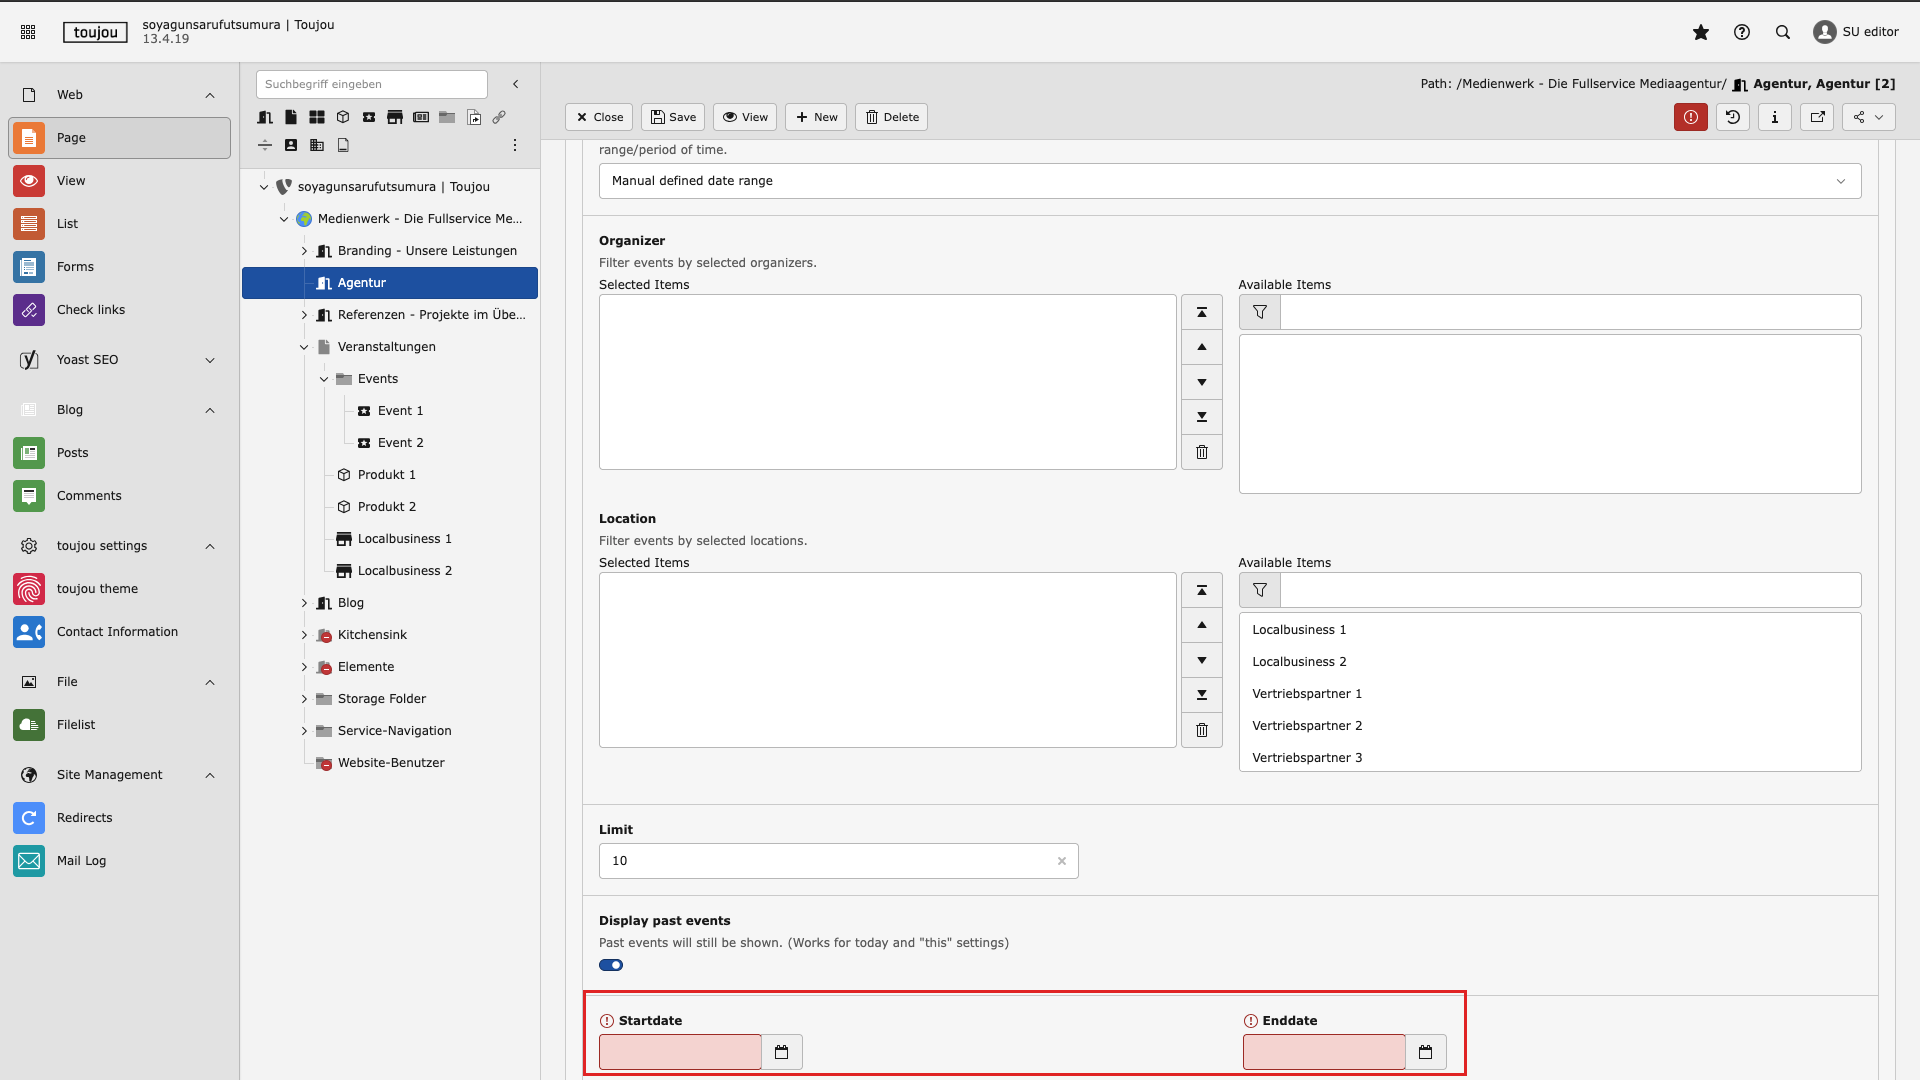
Manual defined date range
- Enter the start date and the end date by clicking in the field or on the calendar icon (mandatory).
- Enter the maximum number of events displayed in the text field limits.
- Specify more details by filling the Organizer and Location fields via available items on the right.
- Save your settings.
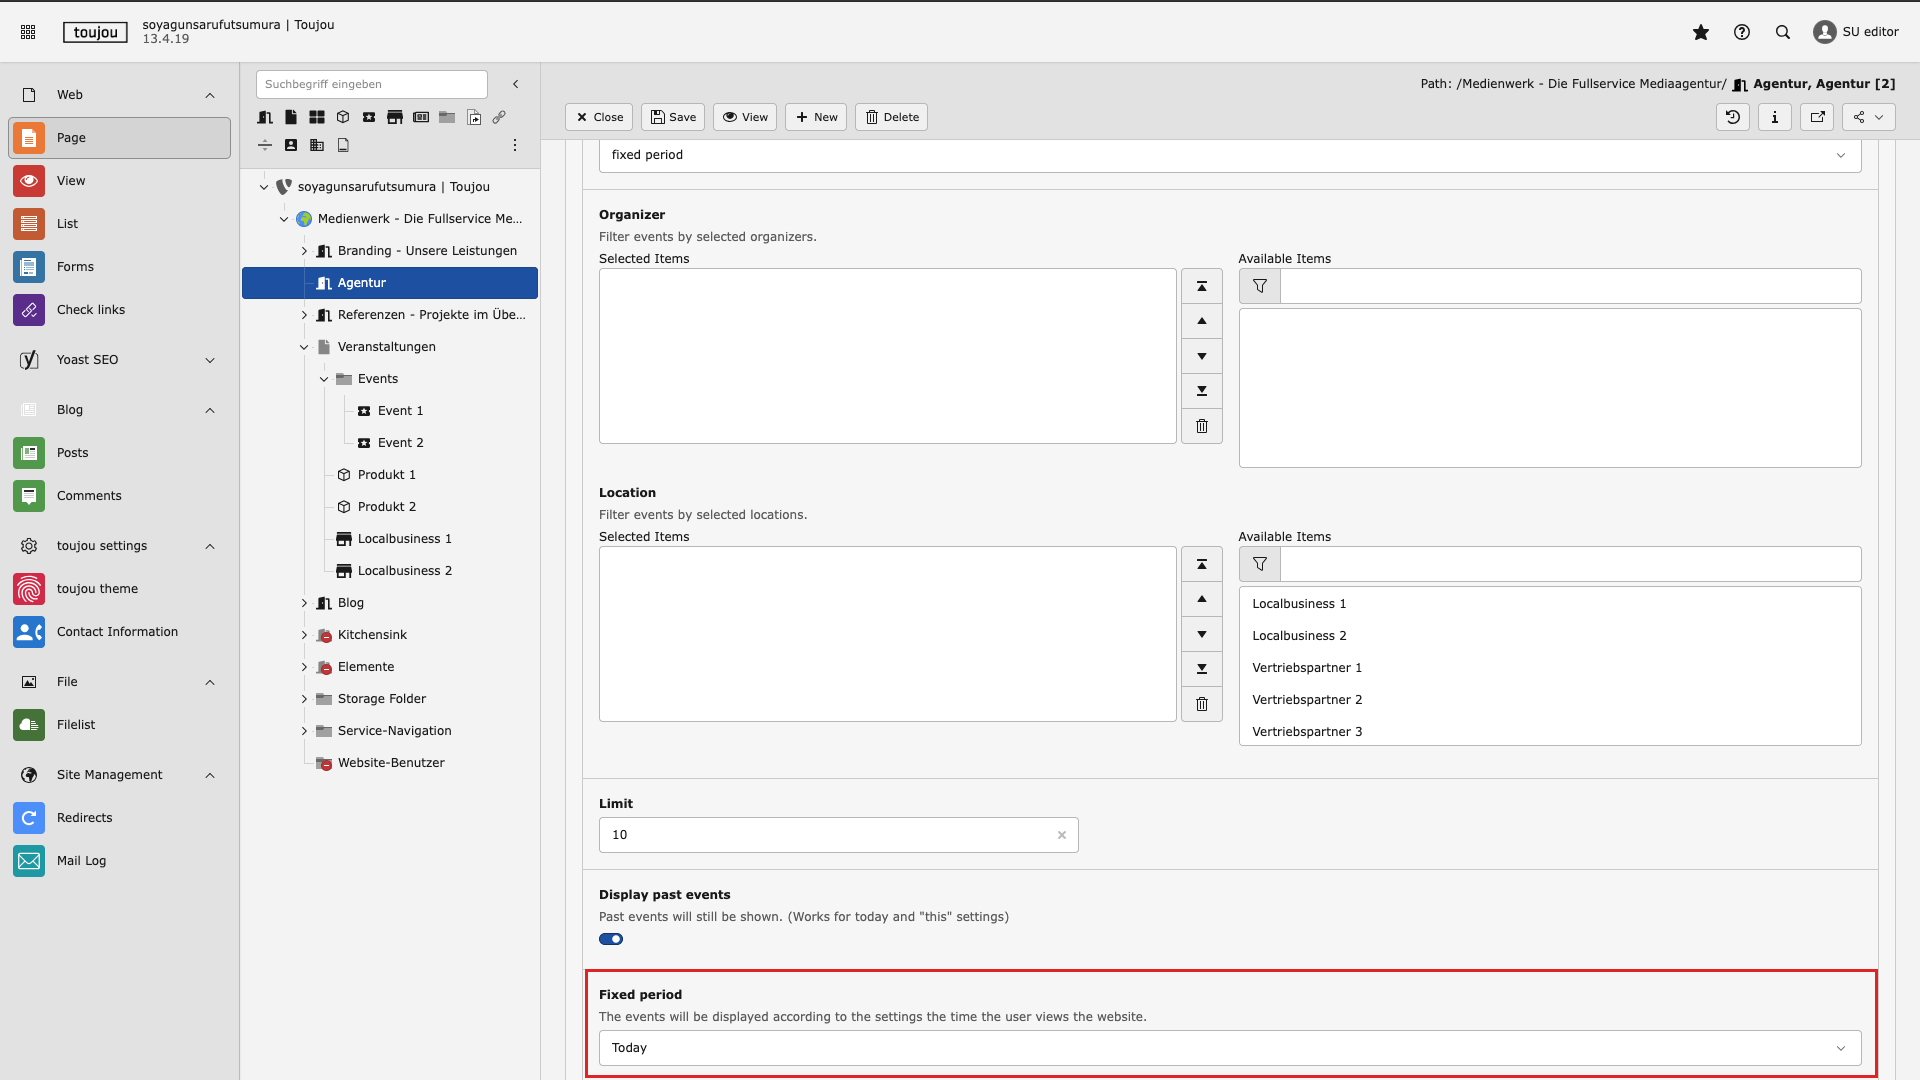
Fixed period
- To select the desired time unit from the various options click on the drop-down menu within fixed period.
- Save the settings.
Screen adaption
This element refers to data from the individual event page, including page name, date, and time. A detailed description of how to store this data can be found in the TYPO3 tutorial “Events”.
Special feature: You can link directly from the event schedule to another page. To do this, the external link must be selected as an option on the corresponding event page.