Timeline
The Timeline element allows you to display a timeline on your website. You can store any number of individual entries, which are automatically linked to form a timeline. There are various options for storing details for the individual entries. The timeline can also be aligned horizontally or vertically.
Sample view Step by step Screen adoption
Sample view
2018
Launch of toujou
The TYPO3 website builder was officially launched in 2018.
2020
New Features
Not only in 2020, but also this year, new features were released for toujou. One example is the event module, which can be used to tease events.
2022
More Flexibility
This year, the website builder was set to demonstrate its flexibility by enabling not only the included elements and features, but also system integrations with toujou.
2024
Release Timeline Element
Im Jahr 2024 wurde Timeline als eines von 150+ toujou-Elementen für alle toujou-Kunden und -Anwenderinnen zugänglich.
Step by step
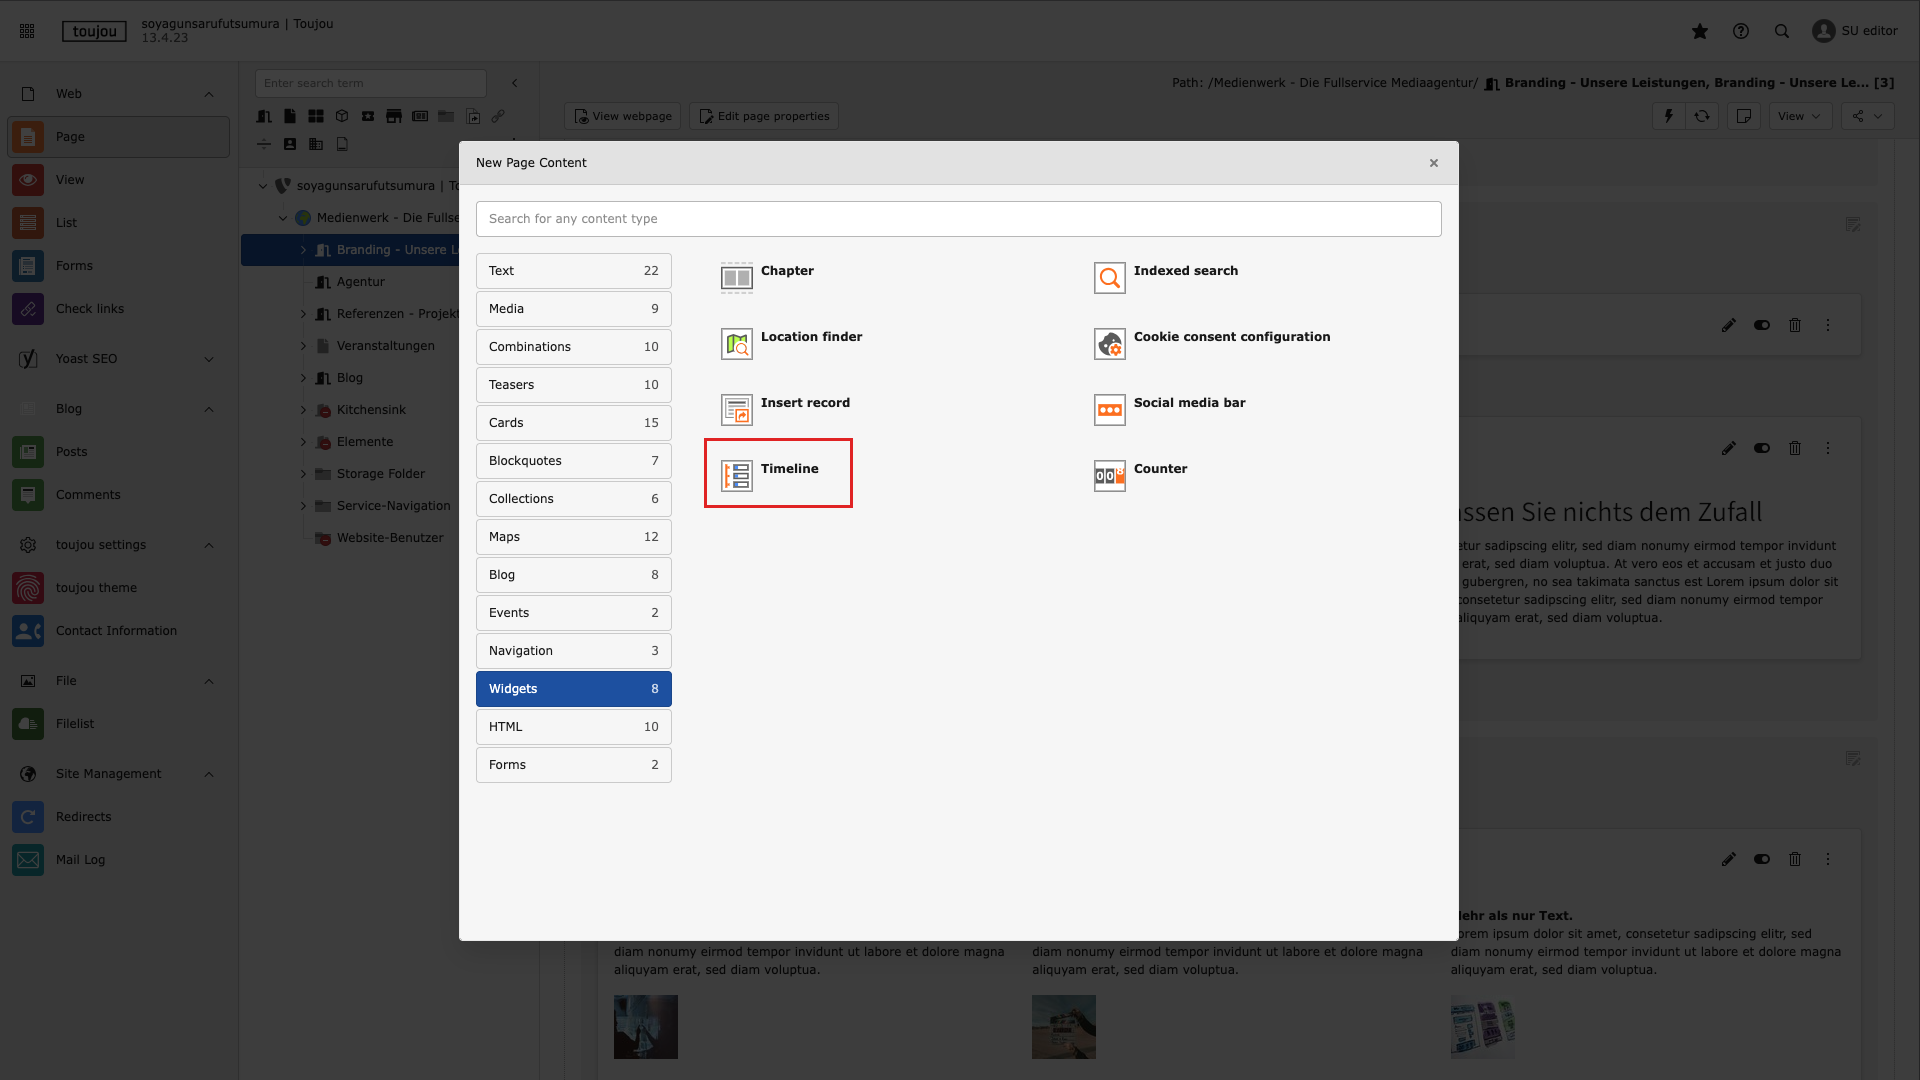
Select Timeline element
- After clicking on + New Content in the content area of your page, the window for selecting the element will open.
- Select the Widgets tab and then Timeline.

Create a time period
- In the General tab, click on + Create new in the Timeline item area to create individual entries.
- The input mask for this entry will then open.
- In this way, several time periods can be created in the Timeline Element.
Set year, title, and text
- Various options are available for a time period on the timeline in an entry.
- Enter a year in the field under Year.
- Enter the desired heading in the field under Title.
- You also have the option of entering a descriptive text in the field under Text.
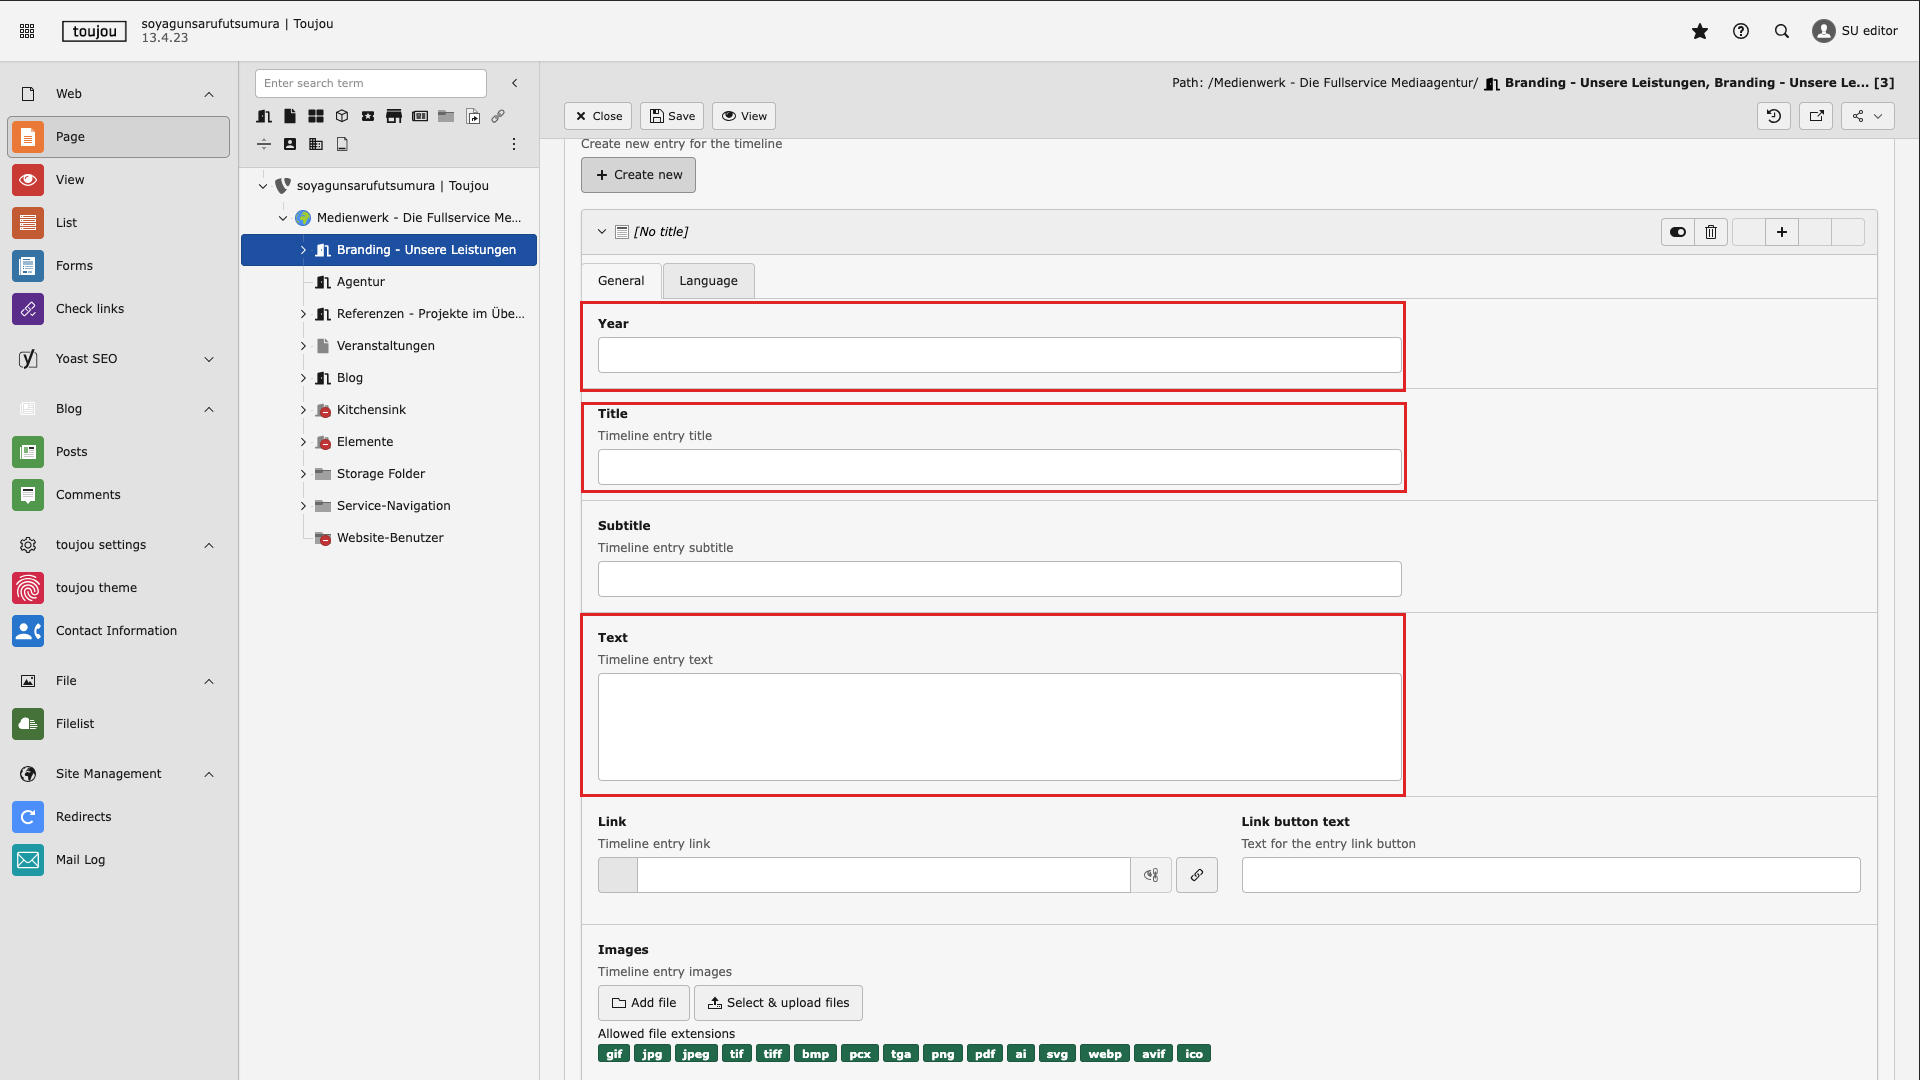
Add image and link
- Add media to a timeline entry in the Images section using the Add file or Select and upload file option.
- In the Link section, click on the chain icon to select the page you want to link to. In the Link button text, define the corresponding link text/CTA.
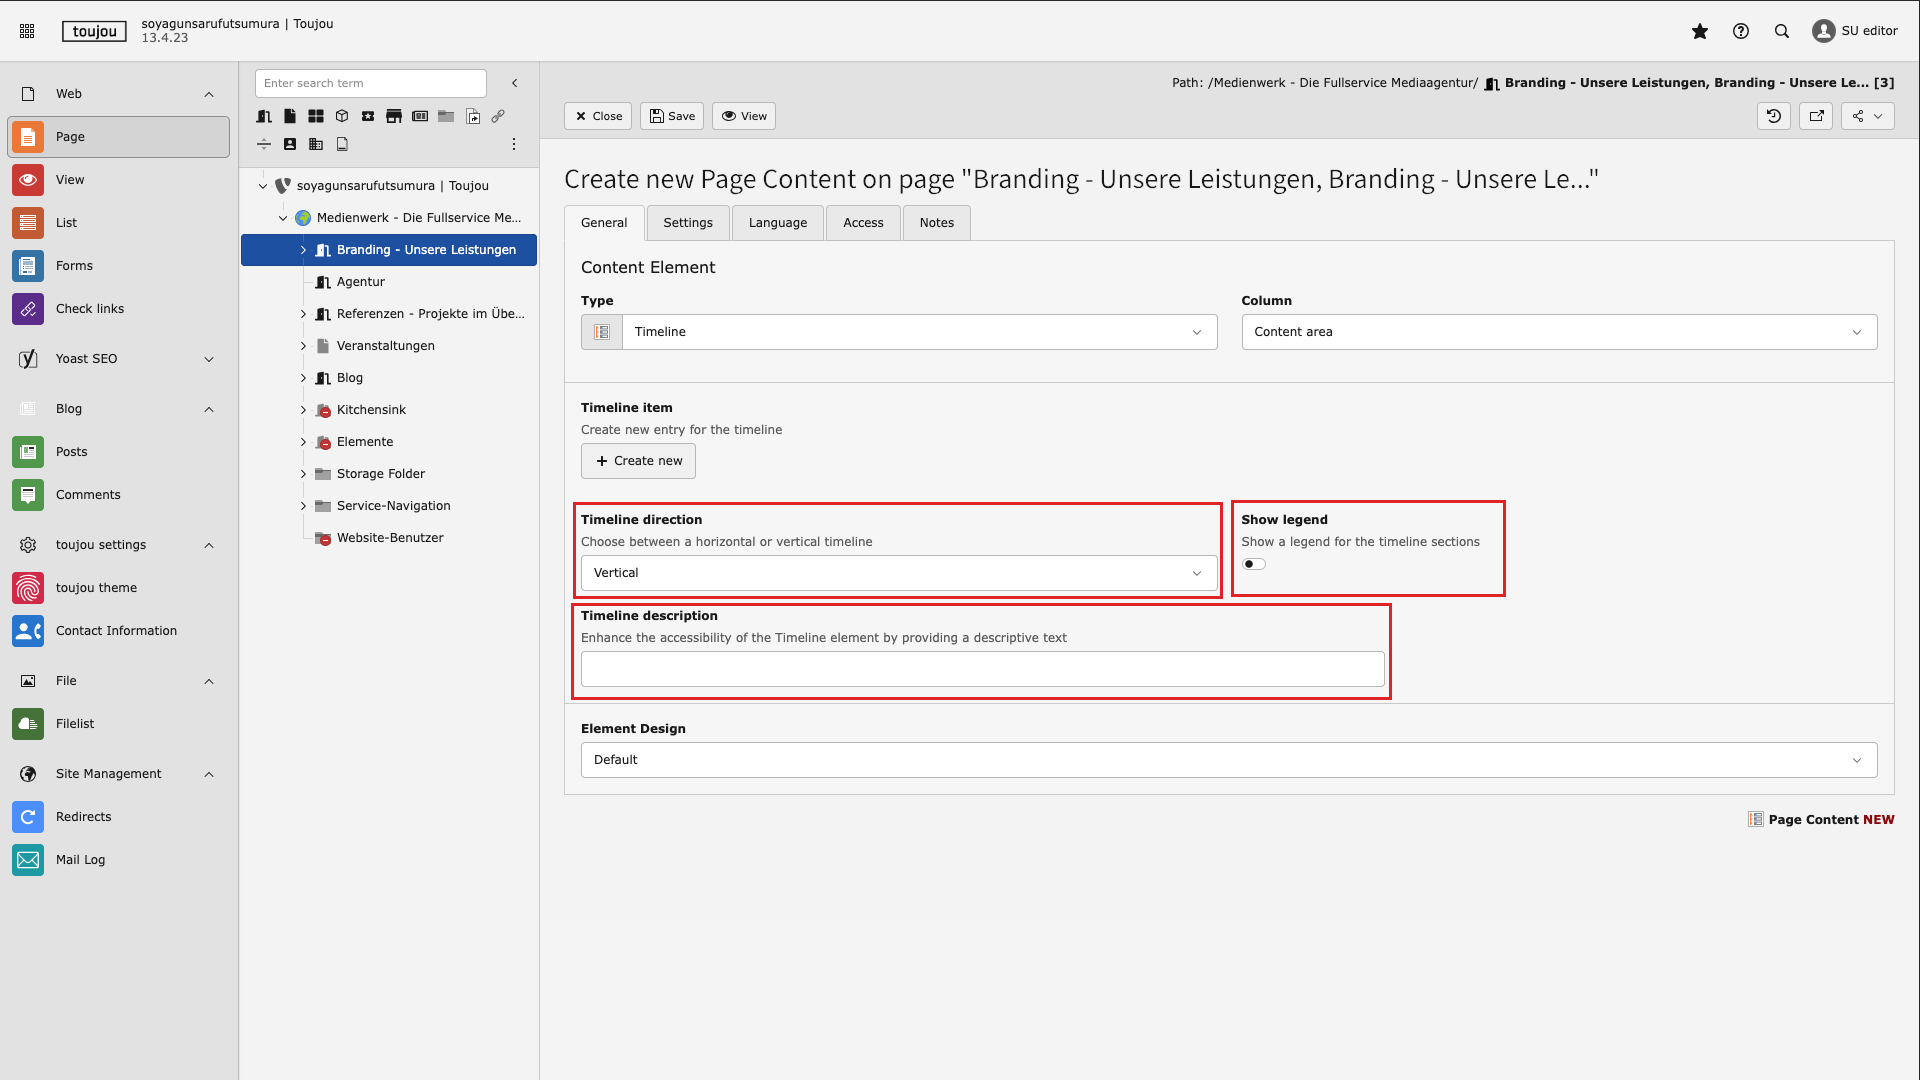
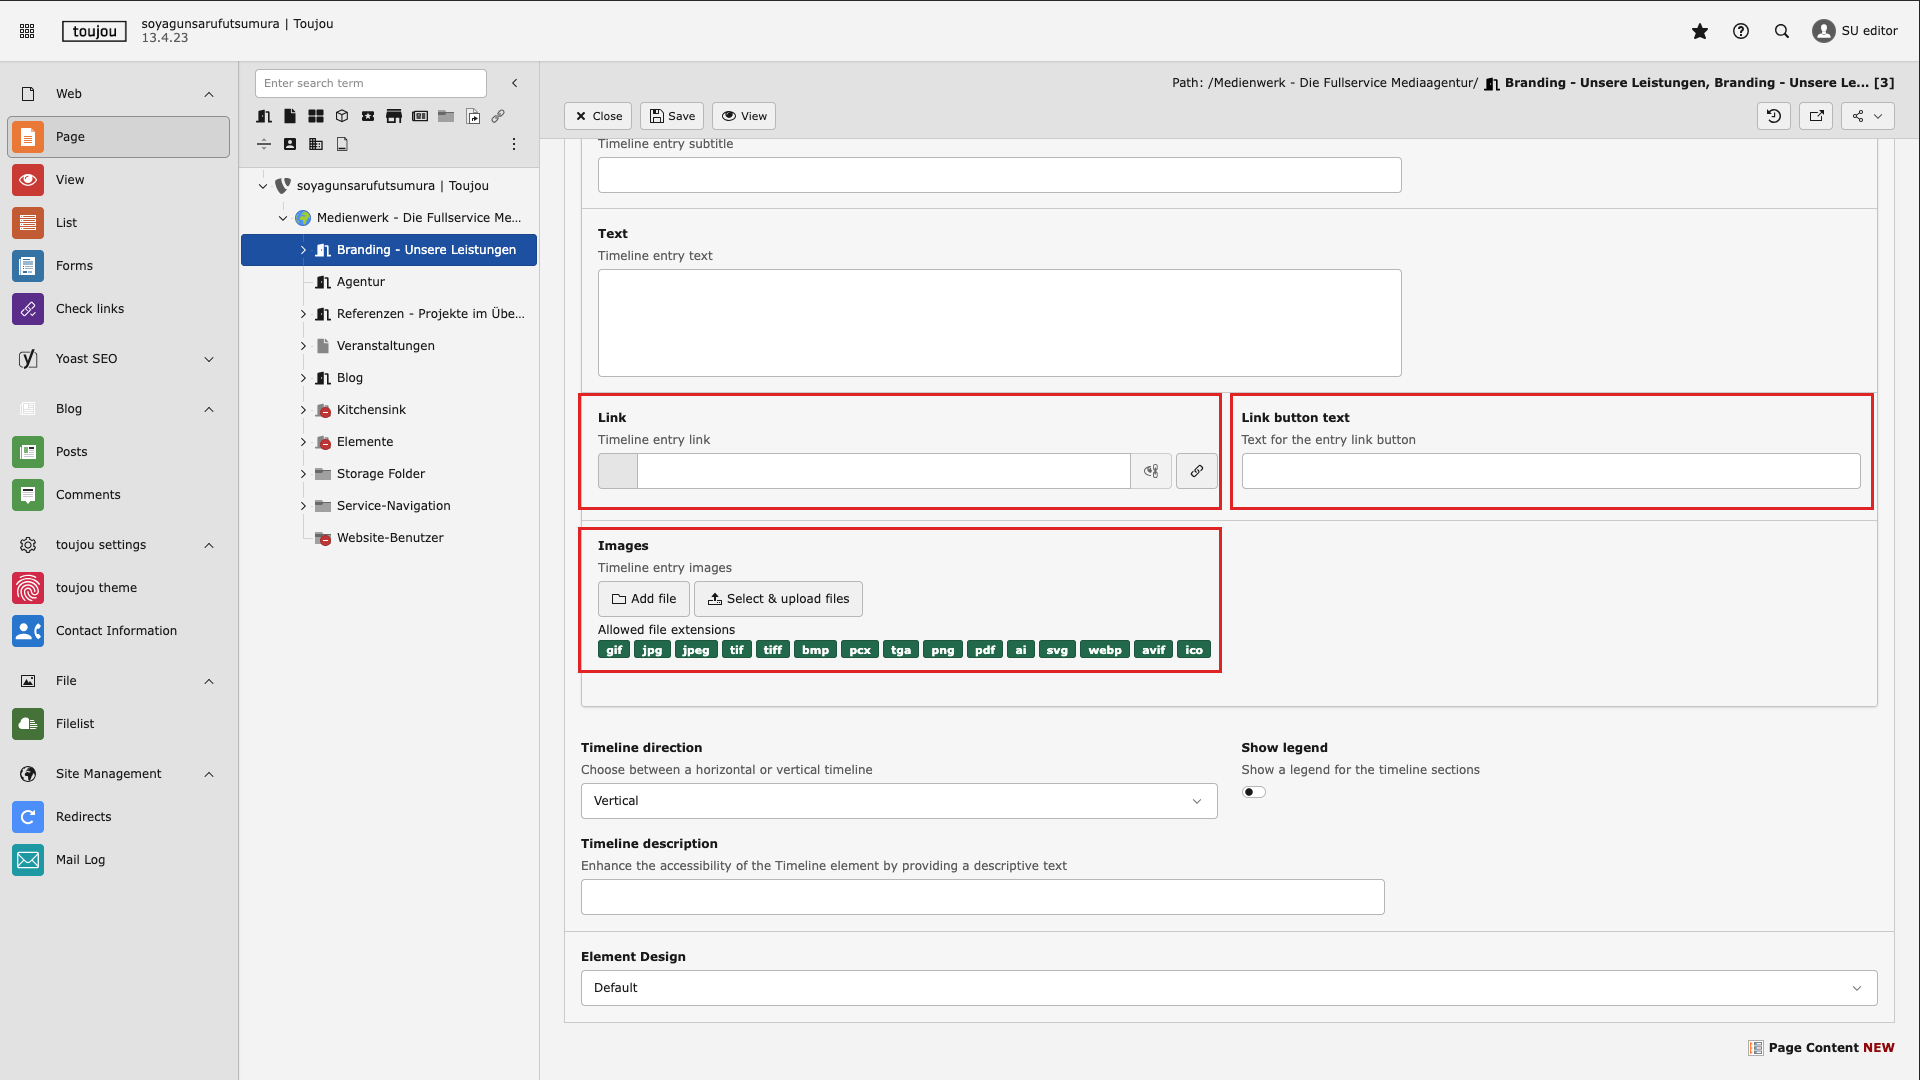
Set additional options
- Under Timeline direction, click the drop-down menu to choose whether the entire timeline is displayed vertically or horizontally.
- In the Show Legend area, use the slider to define whether a table of contents for the individual entries is displayed as a legend.
- Under Timeline Description, you can optionally add descriptive text in the text field to improve the accessibility of the entire element.
- Finally, save the settings.
Screen adoption
Notes: At least two entries must be created for the Timeline element to function. The field next to the link button must be filled in for the link to be displayed in the frontend.
The field in the Timeline Description area must be filled in to ensure website accessibility. Only then will the element be marked with aria-label. There are no limits to your creativity when it comes to the descriptive text. The description of the purpose of the corresponding timeline always serves as a guide.
Linked Tutorials
Tutorials related to this element.
Image- & Video via Fileadmin Tutorials Element library